Monday, December 3, 2012

Getting Ready for the Holidays

It has been a busy fall. As I look back I wonder where the time has gone. One minute it is September and school is staring and now we are putting up Christmas decorations.

I have been working on numerous projects. My mom decided this Christmas that all of our gifts had to be handmade. For me this isn't a problem. The problem is what to make. One of my sisters sent me a text saying my nephew had out grown his Iowa Hawkeye hat that I made him last year and that he could also use some mittens. I have never made mittens, so that would be a project that would challenge me, but with so many other projects, time may not be available.

I have been working on some basket patterns also. I had ordered supplies for a backpack and finally dragged out the supplies and pattern and got to work. The thing I have discovered with my last few baskets is that as I get to the top I tend to pull the reed tighter and the top cuts in. Sometimes this is desirable but for the last few patterns, it wasn't necessarily the ideal. At least each basket is unique and I seem to learn a little bit from each one that I do. Part of the problem is I hate to give them away or sell them once I put all the work into them. Plus some of them I don't feel are perfect, so hate to give away something that isn't perfect, but I guess that is what makes each one unique.

Sunday, December 2, 2012

First Holiday Mart

I decided to try and sell my creations at a holiday mart. I found one that didn't have an expensive entry fee and worked into my schedule. The only part was that it was mostly commercial booths (Mary Kay, Avon, Tastefully Simple, Advocare, and the like.) Made a few sales (mostly woven hearts) but most people there were not interested in handmade items. Had a few people stop and look (most like the baskets and the owl hats) but most didn't seemed interested in much more. So next time, need to participate in one geared toward arts and crafts buyers.

Covered the cost of gas to get there and learned about how I want to set up my booth if I do it again. Life is about the little things and continually learning, at that I did!

Monday, August 27, 2012

Coffee Cup Cozy/ Cuff Bracelet

I have been working on all sorts of projects lately, some are new ones, others are ones I have been meaning to try but never seemed to have the time. This one fits into the later category.

Coffee Cup Cozy/ Cuff Bracelet

Gauge isn't important, depends on yarn and crotchet hook you are using.

For mine I used wool, worsted weight yarn and a G hook.

Working in the round
Row 1 - Chain 35, join ends with slip stitch
Row 2 - Single crotchet, slip stitch to first stitch (34)
Row 3 - Single crotchet,  slip stitch to first stitch(34)
Row 4 - 2 single crotchet in first stitch, single crotchet remaining stitches, slip stitch to first stitch (35)

Repeat rows 2-4 until your cozy is the desired size.

In order to figure out how many stitches I needed to begin with I chained a row and slip stitched it together than used a glass to make sure it would fit (also tried to see if it would fit over my hand onto my wrist, since I had seen some double as cuff bracelets)


Monday, August 20, 2012

Craft Idea

I was just recently in Hannibal, MO for a sisters weekend. I am always looking for new ideas for craft project or inspiration for new projects. We save wine corks in our house to use for future projects and we found this idea in the Wine Stoppe while we were out enjoying the Historical Downtown Hannibal. Great way to dress up an inexpensive clock and re-use old corks. Also, a neat wine bottle holder if you have an old guitar (or other instrument) and want to re-purpose it.


Tuesday, August 14, 2012

Reserve Champion!

I entered one of my latest baskets at the Douglas County Kansas Free Fair in the Open Class Fine Arts and received Reserve Champion in the class. So exciting. Hopefully next year I can create one and move to Champion!

Is a basket perfect for a wine bottle!

Inside the basket.


Monday, July 16, 2012

4-H Knitting & Weaving Workshop

Watching a new technique!
We held a fiber arts workshop for our county 4-H'ers. It was great to be able to bring someone else in to teach so I could learn more also.

It was interesting for me since the way I was taught to knit is different then the method being taught. In order to help the youth I had to really focus on how the instructions were presented. Little tools to help them out, like making a puddle to cast on or grabbing a carrot. The idea of going through the front door, picking up your coat and going back out the door in order to make a knit stitch. Made perfect sense to some of the kids once you told them this.

After a few hours of practicing and working on our technique, many of us ended up with small washcloths made from cotton yarn. No two looked the same (mine ended up being more diamond instead of square due to an added row in the middle) but that is the great thing about knitting, every project is unique, even if you use the same pattern!
Weaving using pins, cardboard, a needle, and yarn!


In the afternoon we switched from knitting to weaving. This is something I have not done a lot of (unless you count basket weaving.) Using items many would have around their house we made little looms and made small items like bookmarks or bracelets. Seemed like it would be easy but trying to keep your tension the same and have the sides be even instead of being wider or smaller. Something to continue to work on and practice.


Monday, July 2, 2012

Closed Heart Basket Instructions

Here is a link to basic instructions using smaller reed.


Materials/Supplies

  • 3 feet 3/16" Flat Reed
  • 160 inches 5/8" Flat Reed
  • 1-36 inch piece of Ribbon, 2 - 24 inch pieces of Ribbon
  • Small Clamps or Clothes Pins (wooden clamps or pins tend to work better, the glue dries faster and more evenly)
  • Tacky Glue
  • Basketry Shears or Strong Scissors
  • Tub or Bucket
  • Water
  • Wash Clothes or Rags

1. Cut 10 pieces of 5/8 inch flat reed exactly 16 inches long. Soak in tub or bucket for about 10 minutes (just enough to make a little pliable but not to long or reed becomes brittle again.)

2. Dry off ends of reed. Put a small drop of glue at the end of one piece of reed, and overlap with the end of a second piece, at a right angle. Be sure to align outside edges. Clamp with a clip until glue is dry. 


3. Take another piece, placing it on the opposite side as the first piece. You can use a piece of reed as a spacer if you want exact spacing or eyeball it. 


4. Place the fourth piece under the last piece you added and over the second one, keeping the space consistent, using a small drop of glue on the end each time, and clip. At this point you have made a hole that’s perfectly square at the point of your heart. As you continue adding pieces, be sure to keep your reed parallel and your holes square.


5. Continue alternating the weave adding to the opposite side each time, keeping the space consistent, using a small drop of glue on the end each time, and clip. Repeat these steps until you have used all ten pieces of reed, five on each side, being careful to weave each one in an over and under pattern. One side of the heart is now complete.


7. Turn the  piece over so the heart is pointing toward you. You’ll weave the second side by working in pairs from the center outward. Start with the two pieces opposite the point of the heart. Glue at a right angle, aligning edges.


8. I use an additional clip to hold the heart shut to dry (the red clip in the picture, clipped to two of the cloths pins.) Let dry overnight (if you need to expedite the drying you can put it in the oven on warm, just make sure to watch it.) If you like you can wait until the glue is mostly dry and then lash the sides. I find the heart ends up being flatter when this method is used (the reed isn't dry all the way and thus doesn't keep it's curved form). It depends on what the purpose of your basket is.


9.  Remove clips. Soak the 3/16" Flat Reed long enough for it to become pliable. Starting from the tip of the heart start lashing the sides together, working up one side and down then up the other side and down. Tuck in the ends. 


If you feel the opening is to small or you don't like the shape of the heart you can stuff towels into the opening so the reed is pushed out a little. Many times I will soak the top portion of the heart (that does not have any glue) in order to get the shape I want for the body of the heart.


10. Add the larger ribbon for a handle or hanger. Add a bow on each corner of the heart using the smaller pieces.


Tuesday, May 15, 2012

Baskets

I have been working on my basket weaving skills lately. Volunteered to weave a basket for a silent auction item. It has been awhile since I have made a larger basket. Didn't turn out perfect, but was still fun to make (and those in my book club were impressed.)


I also have been using up some scrapes that have accumulated. The result is a few smaller baskets (all different patterns and sizes.) I recently purchased some different materials too. The accent in the large basket above and the maroon row in the ones below. The maroon material is ficus root. Is a bit delicate but still fun to work with some new materials.


Wednesday, May 9, 2012

Polymer Cool Neck Bands

A project to do to utilize some of the scrape pieces of fabric I have and also to help those who serve through Operation Gratitude. 

How to Make Cool Ties or Bandanas

Each pound of MEDIUM size polymer contains about 115 teaspoons of crystals, which will make at least 50 bandanas at 2 teaspoons per tie.

There are several ways to make Cool Ties.  Cotton fabric will work best, as it has superior wicking properties.  Let your imagination be your guide.  One method is to take an ordinary bandana and make a Cool Tie  by simply folding over the wide edge about an inch or an inch and a half and stitching the “hem” down to create a tube.   Complete the bandanas as with the following instructions for the ties:
grnpushpin.gif (1016 bytes)
Scissors
grnpushpin.gif (1016 bytes)
Tape measure
grnpushpin.gif (1016 bytes)
Serger/sewing machine
grnpushpin.gif (1016 bytes)
4" strip of fabric 45" long (actual length will depend on personal preference)
grnpushpin.gif (1016 bytes)
One Tablespoon of medium Watersorb polymer granules.  order page
DIRECTIONS
  1. Cut one strip of fabric 4" wide from a fabric that is at least 45" wide.   If you want to have a bow to tie use a 60" wide fabric.
  2. Fold the fabric strip in half lengthwise (the piece should be 4" by 22 1/2").   Mark the fold.  This is the center back of the neck band.  Open up the fabric and measure and mark 7" on each side of the center back.
wpe1.gif (9736 bytes)
 
Fold the fabric right sides together the width of the strip (the piece should now be 2" by 45".)  Using a 5/8" seam, stitch between the marks.  (There should be 14" stitched--7" on either side of center back.)
wpe2.gif (4068 bytes)
  1. The tail ends may be rounded or slanted to give a more finished look.  Finish the edges and ends of the rest of the band by serging or turning and stitching.  Press.
wpe3.gif (4363 bytes)
  1. Turn tube right side out and press. At one end of the tube, stitch to close, then double stitch for strength. At this point you should have one end of the tube open.
wpe4.gif (6845 bytes)
5.      Carefully pour the polymer granules into the tube (1-3 teaspoons). Stitch the tube closed. Reinforce with another row of stitching.
wpe5.gif (6199 bytes)
  1. To use the cool neck band, soak in   water for a 15-20 minutes (hot water speeds the hydration process).  As the polymer granules soak up the water "mush" them around so the polymer spreads out equally along the tube.  Tie around your neck for a "Cool Band."  
TIPS
  • The polymer granules are used in gardening soil for water retention. (Use Watersorb Medium 1-3 tsp) Each pound of polymer has about 115 tsp.
  • The cool band can be refrigerated so it is more refreshing on a hot day.
  •  It can be soaked in cold water and used over and over.  
  • If too many polymer granules are used in the tube, the polymer will ooze through the fabric tube.  Generally two teaspoons is all that is needed.
 .... ·         Store in a zip lock bag in the refrigerator, or hang dry.   The polymer will rehydrate again using instructions in step 6.
Prepared by:  Joy Polk, Benton/Franklin Clothing and Textile Advisor, and Kay Hendrickson, Area Extension Agent, Washington State University Cooperative Extension.

Friday, April 20, 2012

White Heart Basket


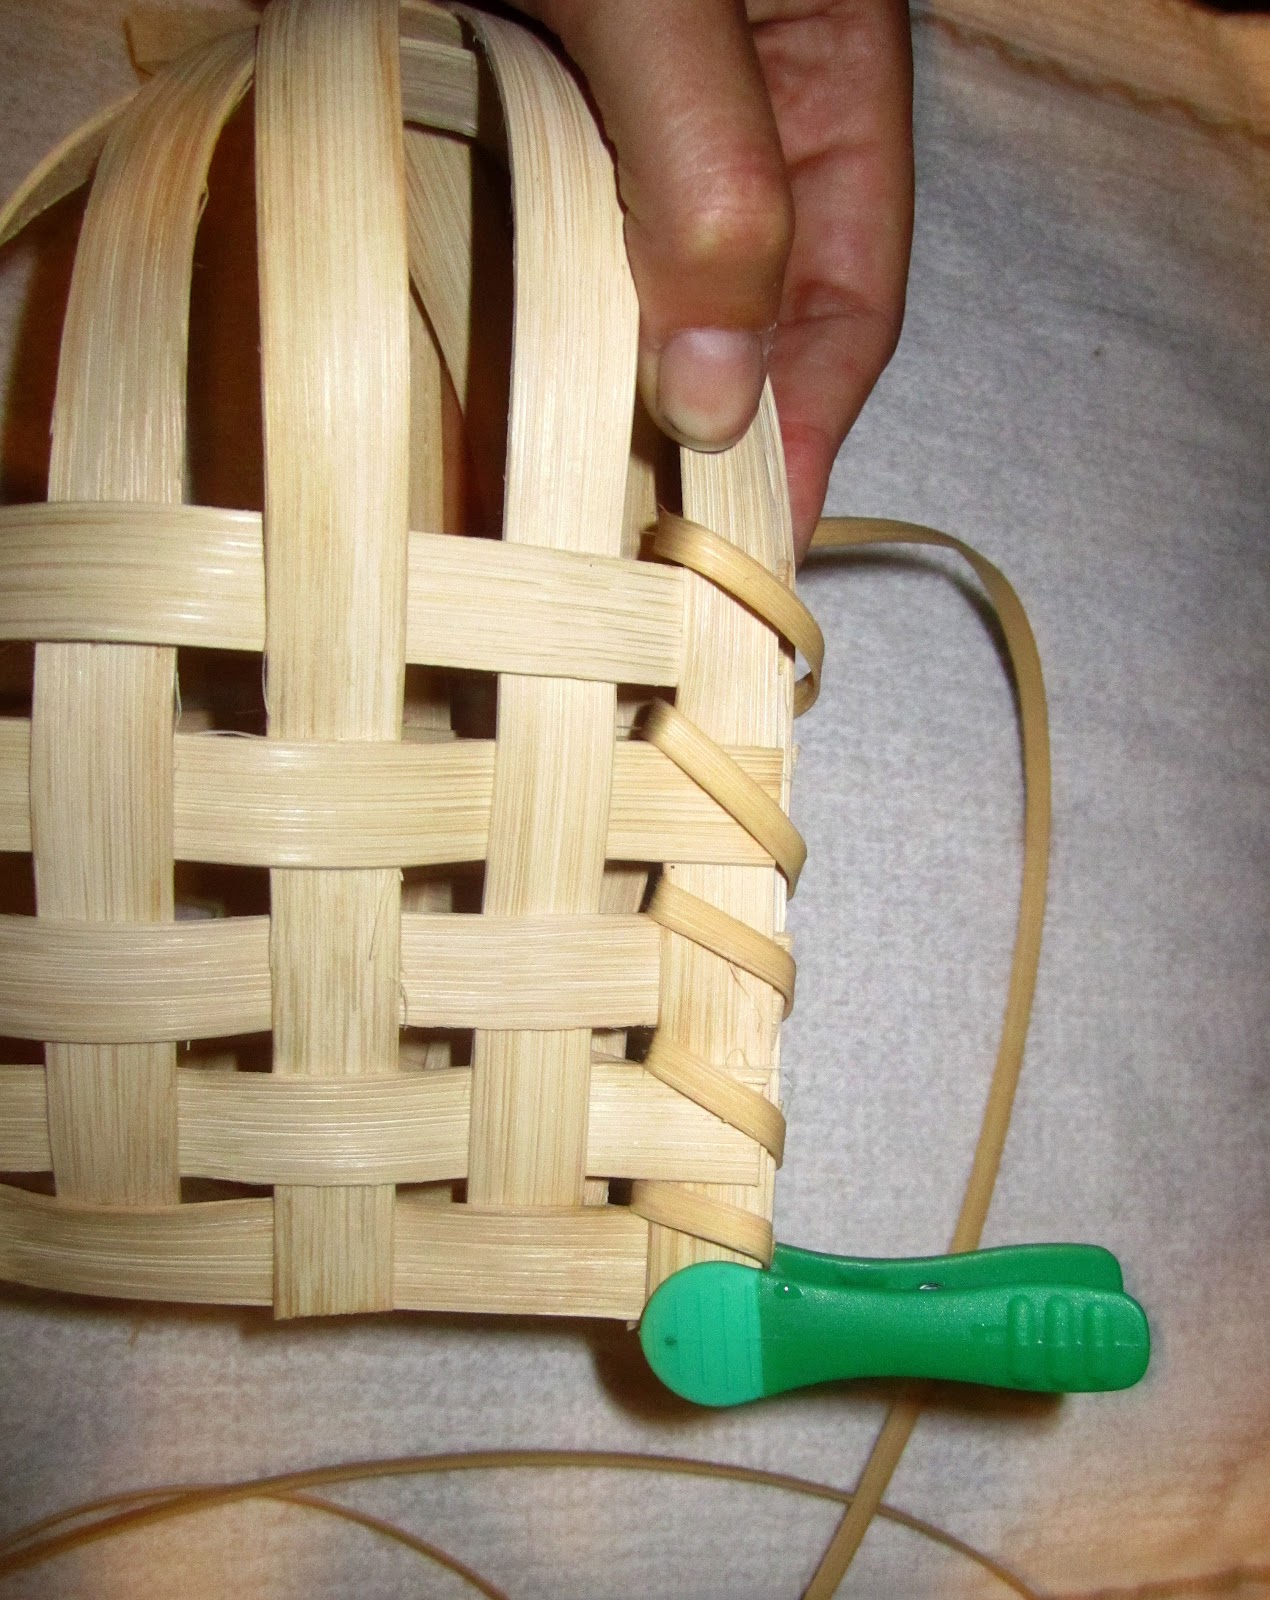
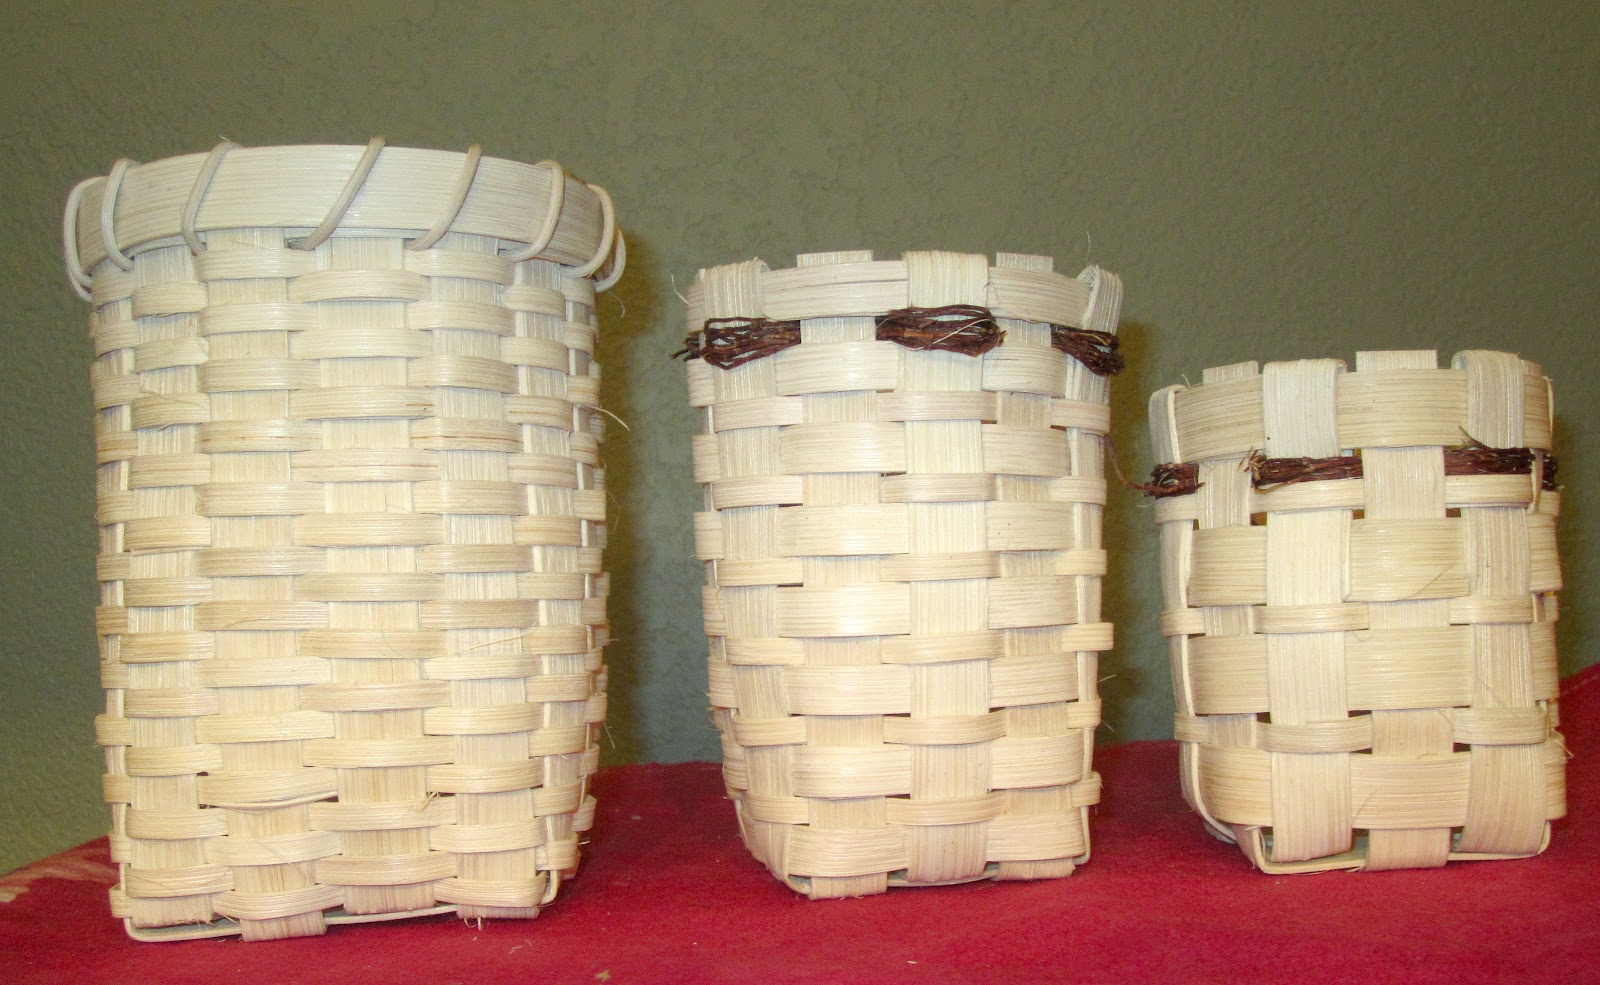
I have been working on some reed heart baskets. After a little experimenting I have found out what works and what doesn't. For my closed reed basket I use a 5/8 inch natural reed. Each one is cut to 16 inches. I did one with 4, 5, and 6 reeds on each side. The one with 5 reeds looks the best in my opinion. I can make the opening a little wider (in case it was to be used for a flower girl basket or a hanging flower basket) by stuffing in some kitchen towels while it is drying. I am working on developing instructions. Getting the time to make one while taking pictures is the key.

Here is a link to basic instructions using smaller reed.

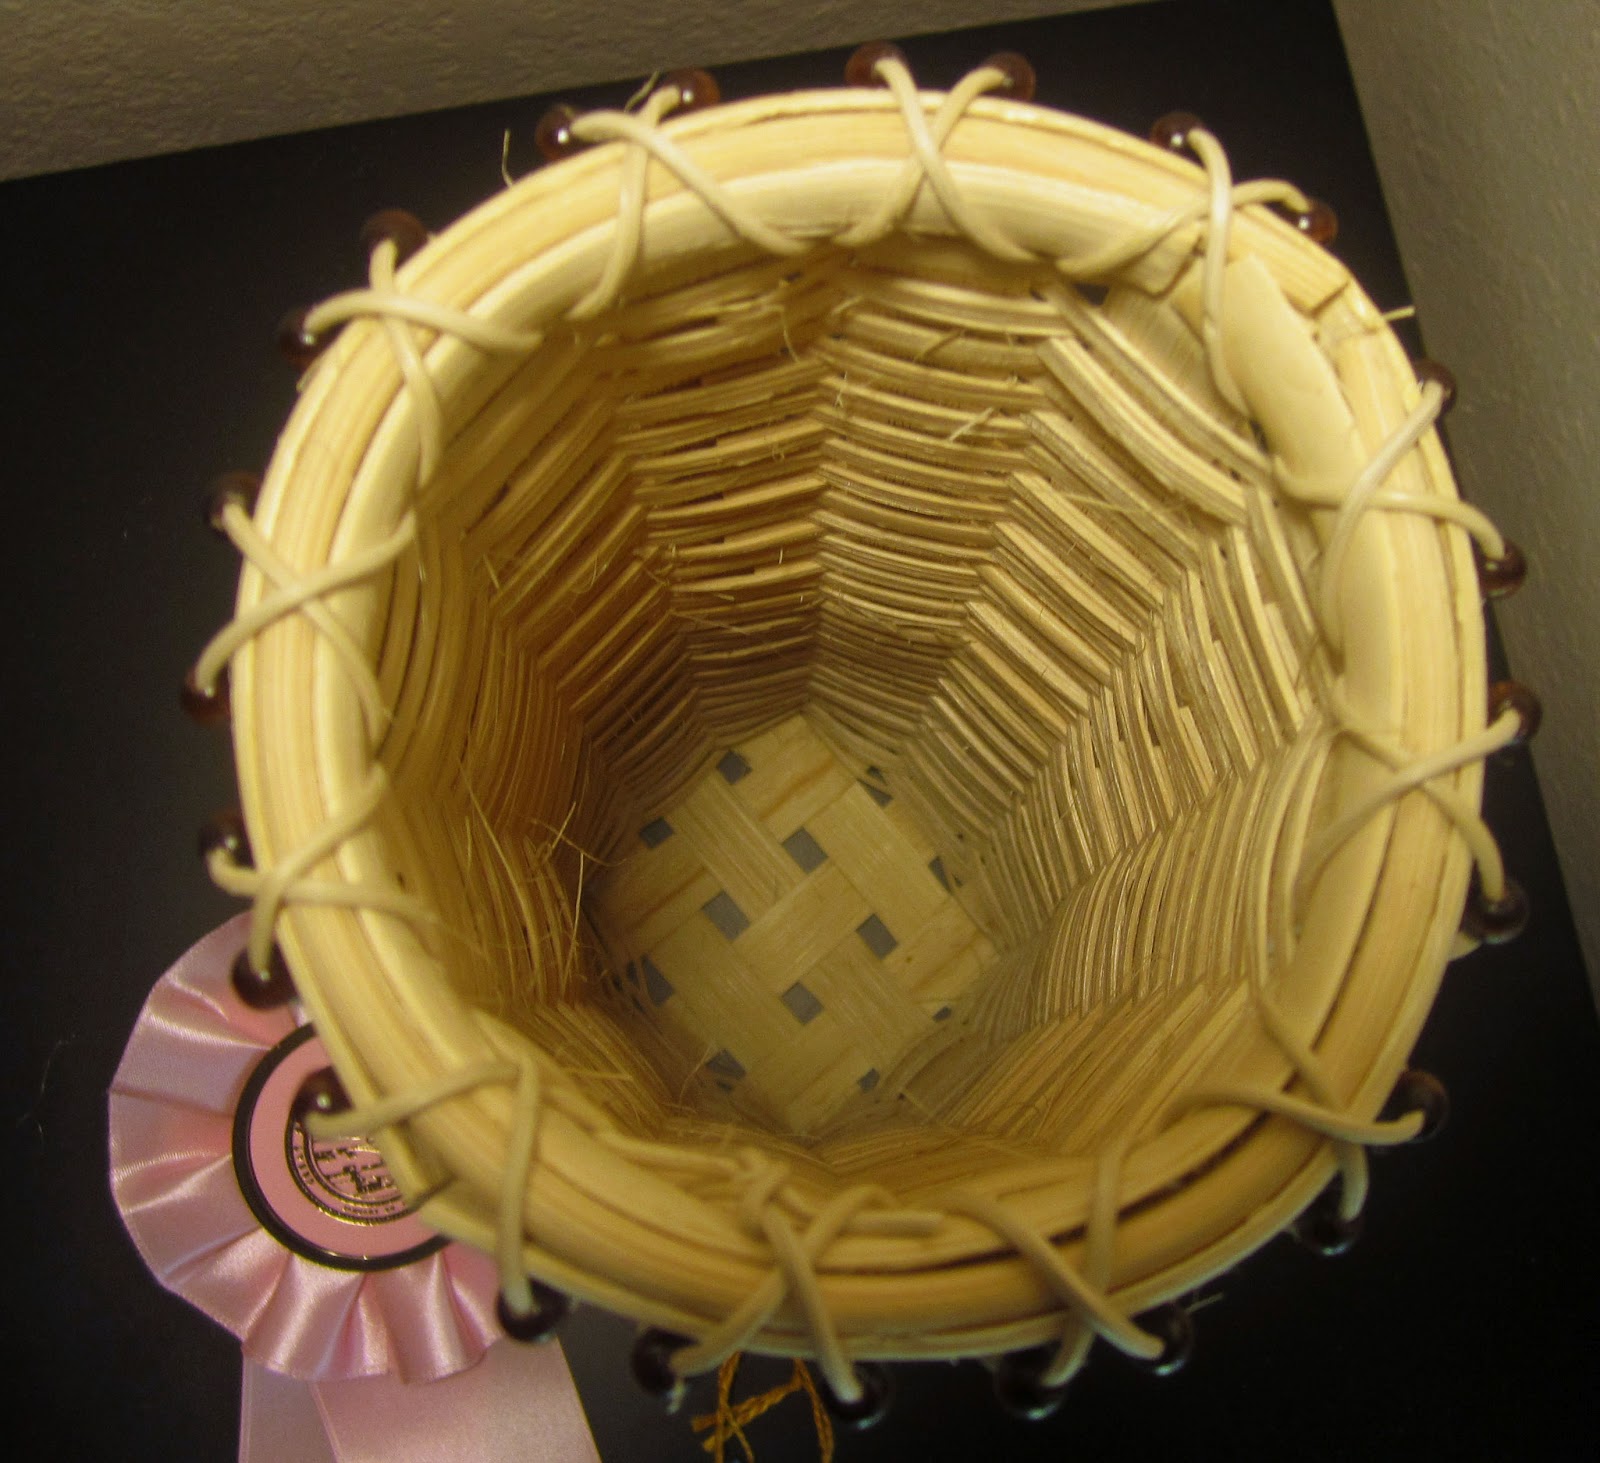
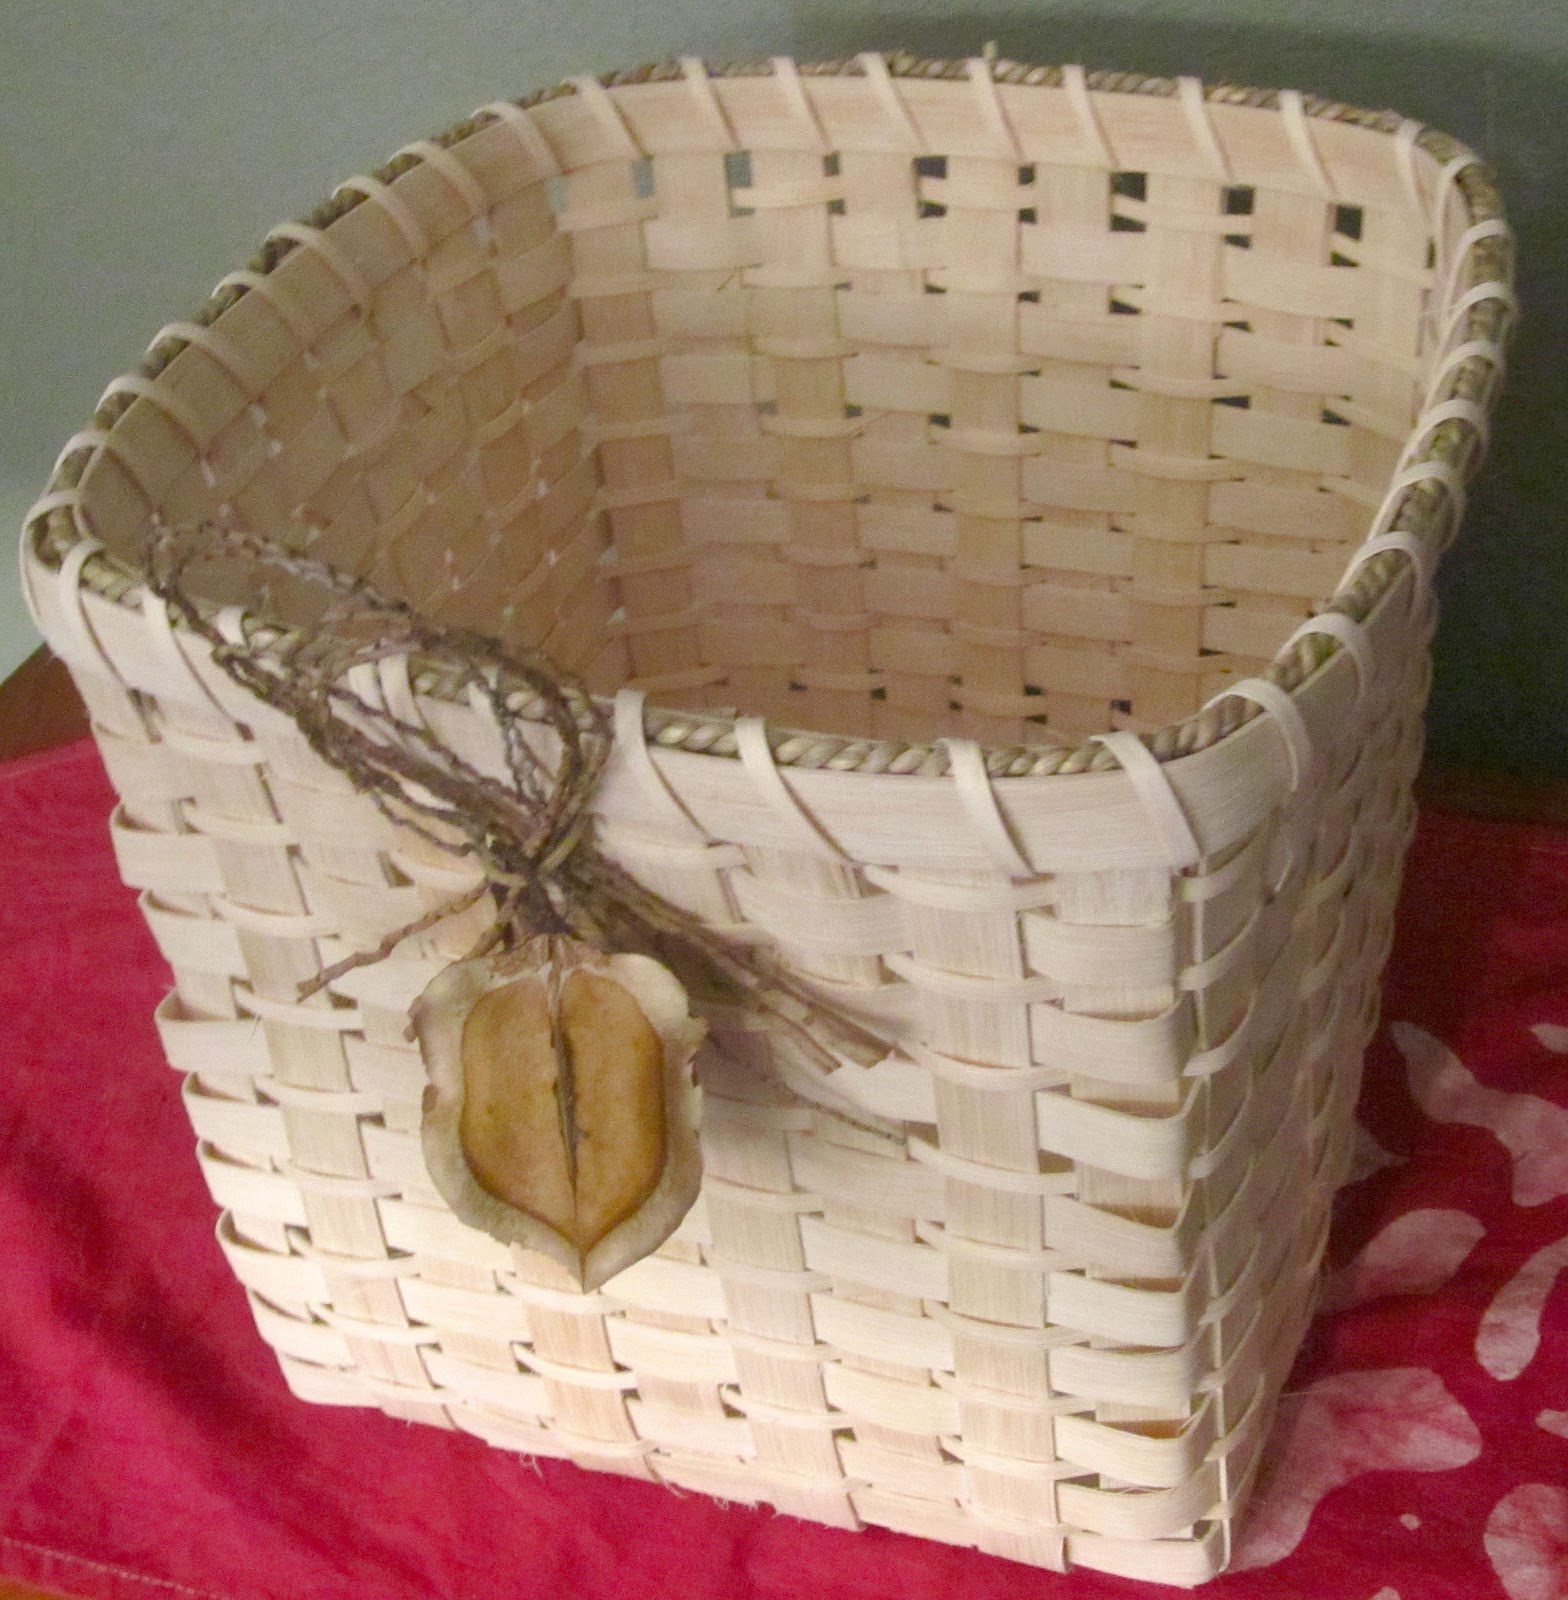
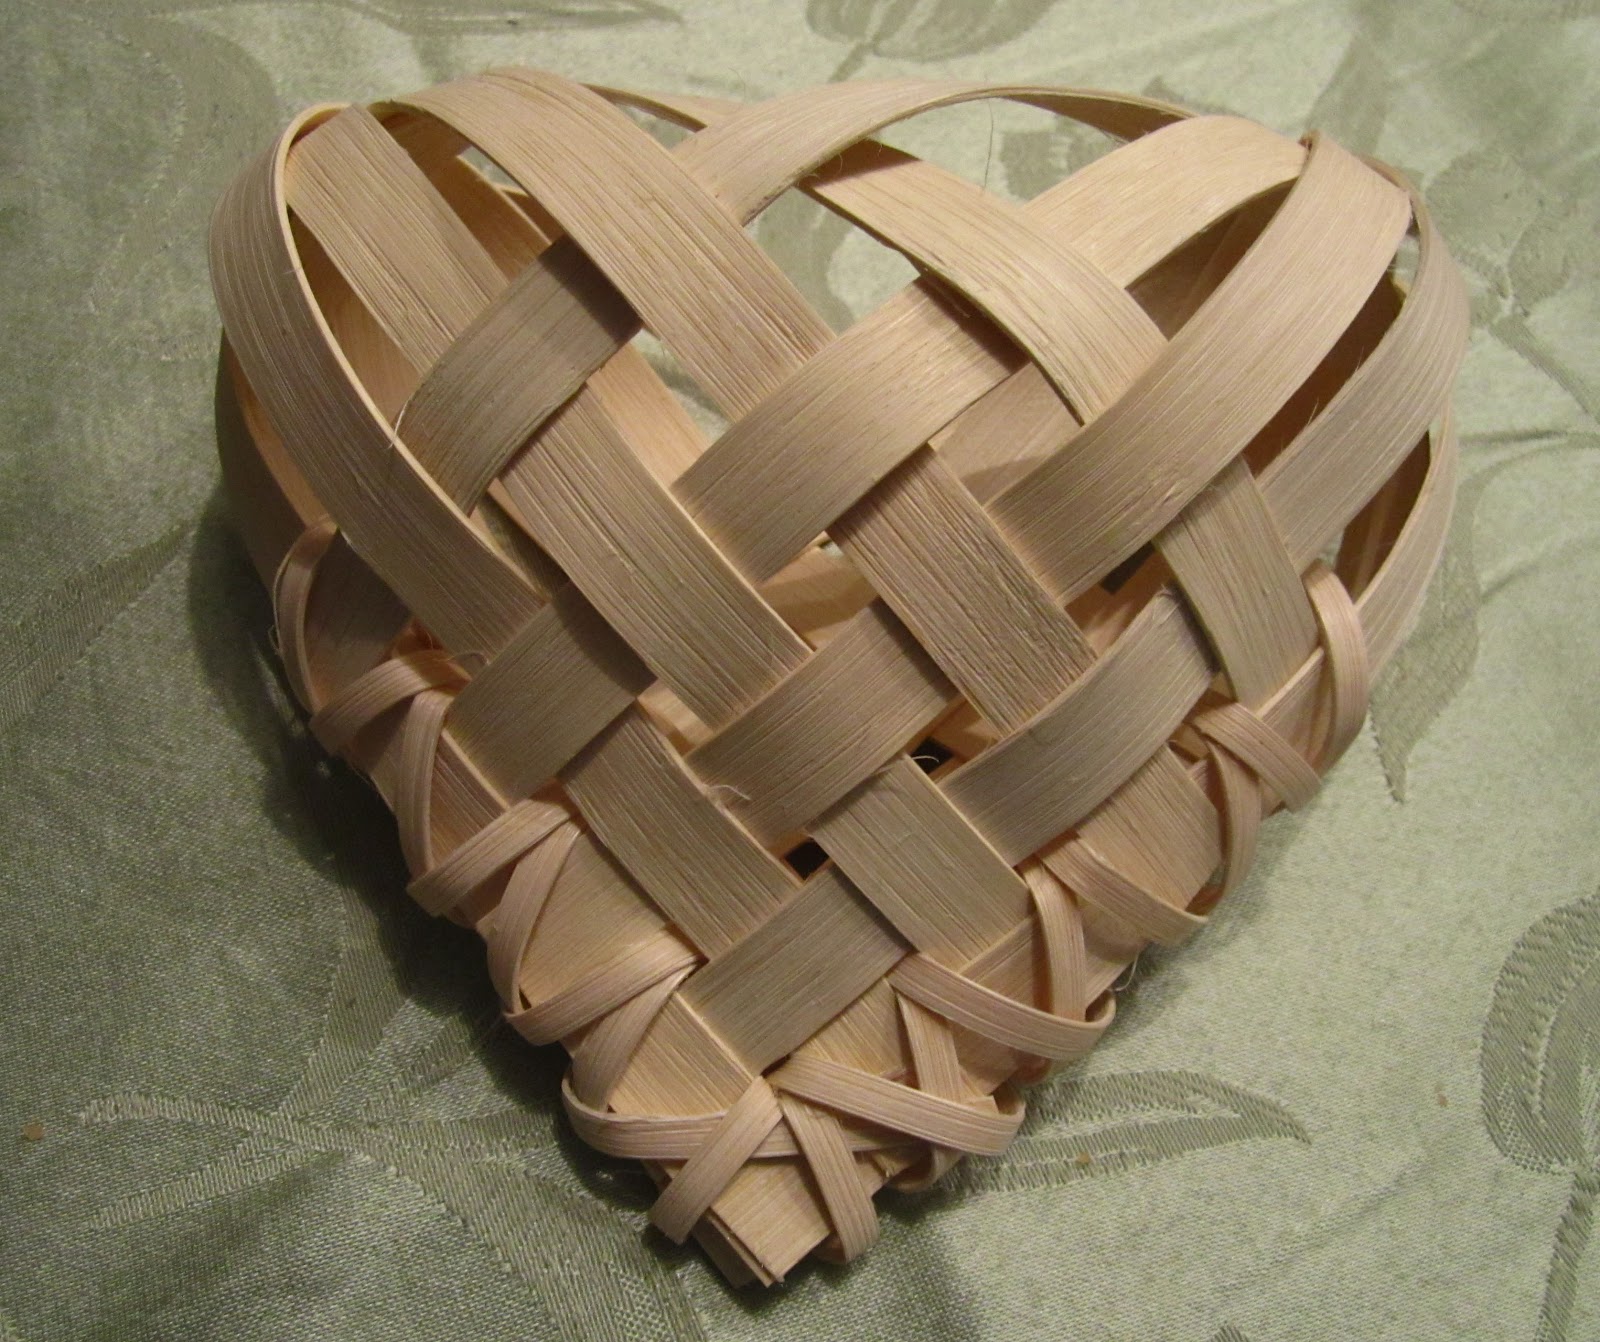
I used round reed for lashing and flat 1/4 inch reed. I liked the look of the round reed (pictured below) while my husband decided he liked the flat reed (pictured above).

I also experimented with lashing the heart when it was still a little wet or waiting until it had fully dried. It tends to be fuller when it is fully dried and then lashed. I soak the top part of the heart (the round parts) for a minute or two before lashing it and then stuff it with some dish towels to help it maintain it's shape while drying. The opening on top is a little wider and the shape is fuller. (As you can see in the bottom picture, the one on the bottom right was lashed before the heart was fully dried.)


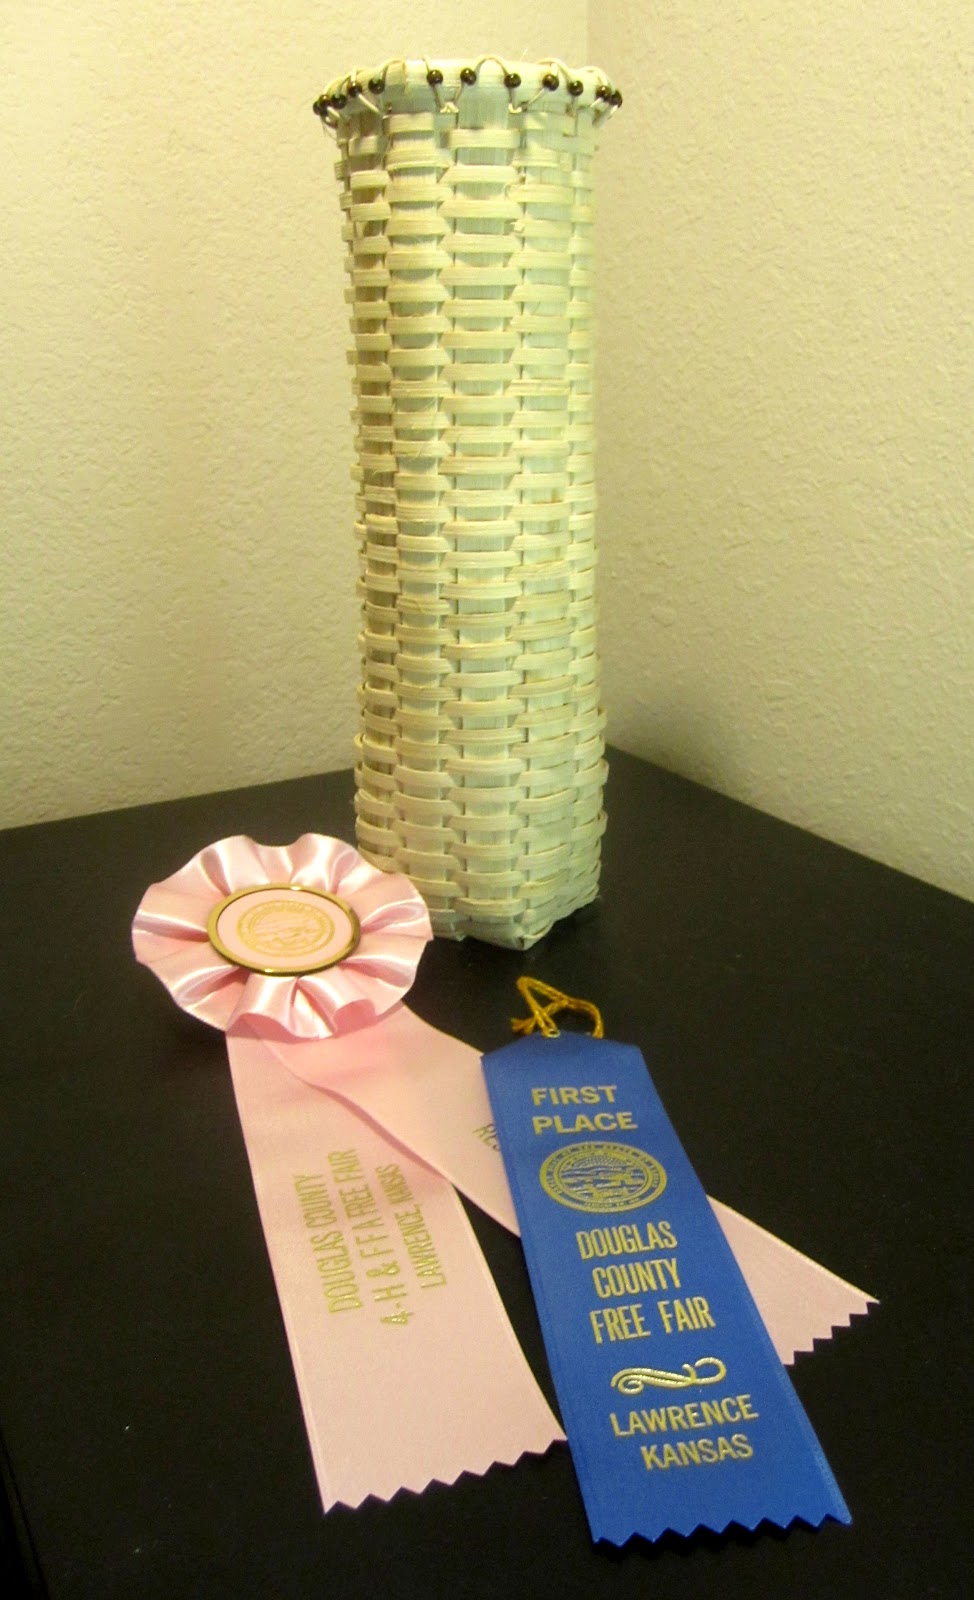
In order to make one white I had to do a little research. Found the best recommendation was to use white pickling. We used an one gallon Ziploc bag and poured about a cup of the pickling in it along with the reed heart. After a couple minutes of shaking to get all the surfaces covered we took it out to dry for three minutes. At this time we patted off any access (that we could get to) and then hung to dry. I later took a paint brush and hit any spots where it wasn't covered well (especially the outside surface.)

We also took a reed heart and used flat, white, spray paint. It was a little easier to cover, but when I went to put on the ribbons, the reed moves a little and you can see a line. Hard to get all of the crevices and edged covered evenly. By using the paint I was able to get a brighter, truer white.

The method I have come to use regularly is first to whitewash using the pickling and follow with a coat of the spray paint to get an even covering. Many times I also finish with a light coat of shellac (you can purchase it in a spray can, it was recommended to me to use for sealing undied or painted reed.) 

I think I like the white-wash better, especially since you can still see some of the grain of the reed. I diluted the pickling a little and the result was a light, white, almost sand colored appearance. (Top: unfinished, Bottom Left: diluted white wash, Bottom Right: white wash and paint)


Tuesday, April 10, 2012

Heart Basket

I had someone ask me today if one of my reed hearts could be used for a flower girl. Since the sides are open, it would not serve this purpose well. The question did get me to thinking about ways that I might be able to adapt the design or use another design to make a heart basket. While doing a little research, all I could find were Swedish heart baskets. These would work great, but are not easily made from reed.

After playing with some paper (since it is easier to manipulate and doesn't cost as much as the reed) I still hadn't come up with a solution. After more pondering I wondered if I could lash the sides together, similar to how I finish many of my baskets. I went home and started to put my idea into reality. Here is the result!


Thursday, April 5, 2012

Learning to Knit

I recently purchased a mystery box of yarn and supplies. When I received the box it also had a set of knitting needles. I had learned how to knit when I was about 10 and quickly moved on to crocheting (and had not knitted since.) I decided to see if I could re-teach myself the art of knitting.

So far it has been a little frustrating since evidently I learned the combined knitting
style of knitting versus the English or Continental style. The result is when I watch videos things seem a little off. I am trying to work on a pattern I found, but have ripped it out more times than I can count. Is starting to look similar to the picture, but I think I may need to switch some stitches (ssk and k2tog) so it slants correctly.

Found a blog that might help me on my journey (and help me realize that I am not alone.) 

I even found a website with a conversion table!

Will see how things go and if I keep knitting or go back to just crocheting!

Thursday, March 15, 2012

Students Finished Work

 Here are pictures from a participant of a rag rug workshop. The rounds were pulled to tight so when they took it off of the frame it curled up and formed a basket or bowl. The cats seemed to like it and have adopted it as a new bed!