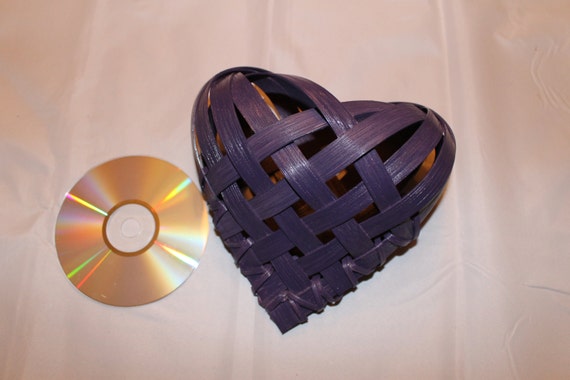
Materials/Supplies
- 3 feet 3/16" Flat Reed
- 160 inches 5/8" Flat Reed
- 1-36 inch piece of Ribbon, 2 - 24 inch pieces of Ribbon
- Small Clamps or Clothes Pins (wooden clamps or pins tend to work better, the glue dries faster and more evenly)
- Tacky Glue
- Basketry Shears or Strong Scissors
- Tub or Bucket
- Water
- Wash Clothes or Rags
1. Cut 10 pieces of 5/8 inch flat reed exactly 16 inches long. Soak in tub or bucket for about 10 minutes (just enough to make a little pliable but not to long or reed becomes brittle again.)
2. Dry off ends of reed. Put a small drop of glue at the end of one piece of reed,
and overlap with the end of a second piece, at a right angle. Be sure
to align outside edges. Clamp with a clip until glue is dry.
3. Take another piece, placing it on the opposite side as the first piece. You can use a piece of reed as a spacer if you want exact spacing or eyeball it.
4. Place the fourth piece under the last piece you added and over the second one, keeping the space
consistent, using a small drop of glue on the end each time, and clip. At this point you have made a
hole that’s perfectly square at the point of your heart. As you continue adding pieces, be sure to keep
your reed parallel and your holes square.
5. Continue alternating the weave adding to the opposite side each time, keeping the space
consistent, using a small drop of glue on the end each time, and clip. Repeat these steps until you have used all ten pieces of reed, five on each side, being careful to
weave each one in an over and under pattern. One side of the heart is now complete.
7. Turn the piece over so the
heart is pointing toward you.
You’ll weave the second side by working in pairs from the center
outward. Start with the two pieces opposite the point of the heart.
Glue at a right angle, aligning edges.
8. I use an additional clip to hold the heart shut to dry (the red clip in the picture, clipped to two of the cloths pins.) Let dry overnight (if you need to expedite the drying you can put it
in the oven on warm, just make sure to watch it.) If you like you can wait until the glue is mostly dry and then lash the sides. I find the heart ends up being flatter when this method is used (the reed isn't dry all the way and thus doesn't keep it's curved form). It depends on what the purpose of your basket is.
| 9. Remove clips. Soak the 3/16"
Flat Reed long enough for it to become pliable. Starting from the tip of
the heart start lashing the sides together, working up one side and
down then up the other side and down. Tuck in the ends.
If you feel the
opening is to small or you don't like the shape of the heart you can stuff towels into the opening so the reed is
pushed out a little. Many times I will soak the top portion of the heart (that does not have any glue) in order to get the shape I want for the body of the heart.
10. Add the larger ribbon for a handle or hanger. Add a bow on each corner of the heart using the smaller pieces.
|
 Check out some of the things being made at Vintage Wedding Gems.